Sync MongoDB data in real time to S3 without AWS DMS
You have been syncing MongoDB data to S3 using AWS DMS for consumption by Redshift or other services. However, as of today, it only supports till MongoDB version 4.2, and support for the latest versions may not come for a while.
MongoDB’s latest major release is 6.0 and you wish to upgrade to this new version to benefit from the amazing new features, but you are concerned about your data pipeline currently running through DMS.
Don’t worry.
Atlas Developer Data Platform provides all the necessary ingredients for this. And in this article, we will explore the right recipe to mix these ingredients.
Ingredients:
- MongoDB Atlas Clusters
- Change Streams
- Atlas Data Federation (ADF)
- Scheduled Triggers (Atlas App Services)
- Atlas Admin API / Atlas CLI
Layout:
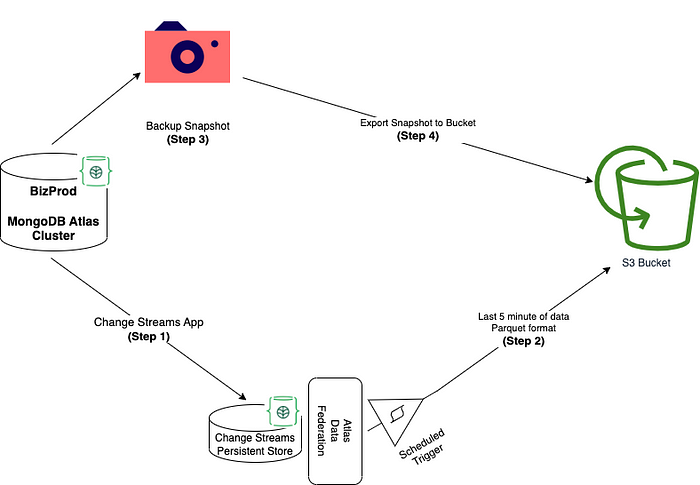
- MongoDB Change Streams will be used to pick the changes from the source cluster.
- These changes will be staged in another Atlas cluster.
- Atlas Data Federation can be used to read and write these changes in bulk into S3 buckets.
- A new backup snapshot will be created and this will be copied to the S3 bucket using Atlas Admin API / Atlas CLI.

Details:
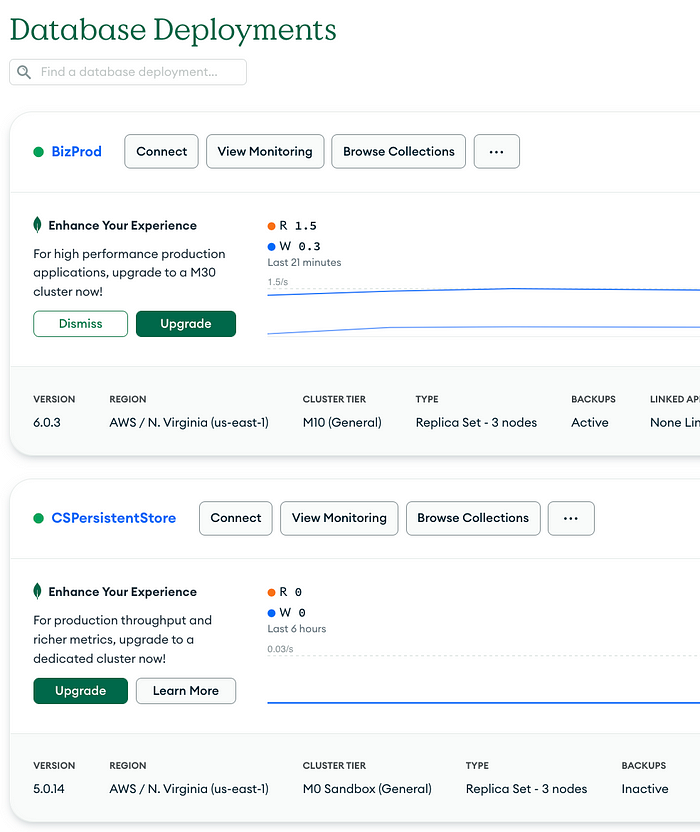
- Create a dedicated Atlas cluster for sample production environment aka BizProd and another small Atlas cluster aka CSPersistentStore for persisting the changes captured from this environment.

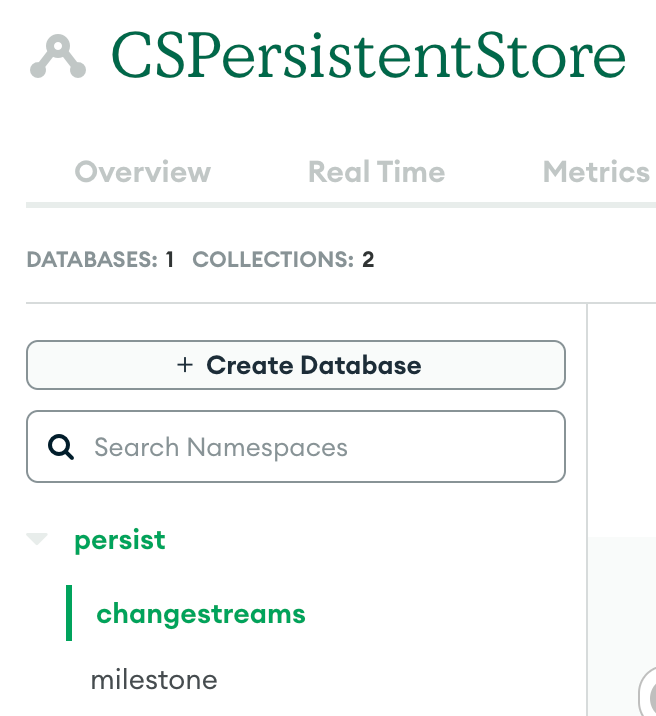
2. Create two collections named changestreams and milestone.
Former will persist the changes captured from the source cluster and latter will make a record of the milestone upto which these changes have been published in the S3 buckets.

3. Create a Change Streams App in Python that watches for the changes in the cluster and writes them in the persistent store.
Code: https://github.com/Ankur10gen/cdccapture/blob/main/main.py
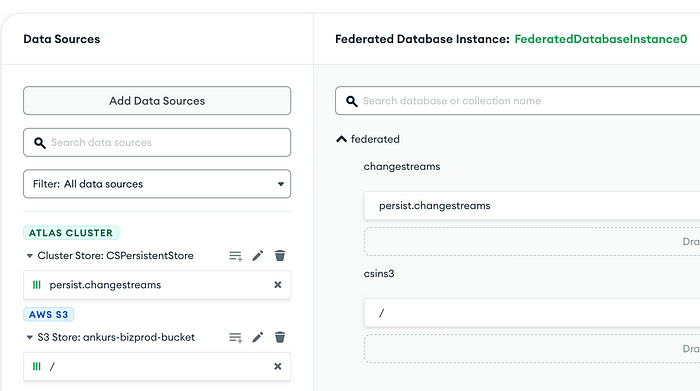
4. Create an ADF endpoint with persist.changestreams as a data source. Also, add your S3 bucket as a data source.

4. Create a Scheduled Trigger calling function pickAndDeliver which picks the events from ADF Atlas source collection and pushes them to ADF S3 bucket.
Code: https://github.com/Ankur10gen/cdccapture/blob/main/AtlasAppService/functions/pickAndDeliver.js
5. Create a backup snapshot of the source BizProd cluster and export it to the S3 bucket
Code: https://github.com/Ankur10gen/cdccapture/blob/main/CreateExportSnapshot/main.py
Layout in S3:

GitHub Repo: https://github.com/Ankur10gen/cdccapture
In this case, our snapshot is in json.gz format while our changes are in Parquet. We can use ADF again to process our snapshot from json.gz to Parquet if needed.
Note that since TimeSeries collections don’t yet support Change Streams, they cannot be copied through this workflow. However, since they always have a time field, they can be copied directly from the source cluster to the S3 bucket using Scheduled Triggers without writing changes in an intermediate place first.
I hope this article helped you understand the components and their arrangement in the process. Drop a comment should you have any questions.
